Lunch With Loni

Just another WordPress.com weblog

Mexican Chili Cheeseburgers May 24, 2014

Filed under: Uncategorized — lonislens @ 8:45 pm

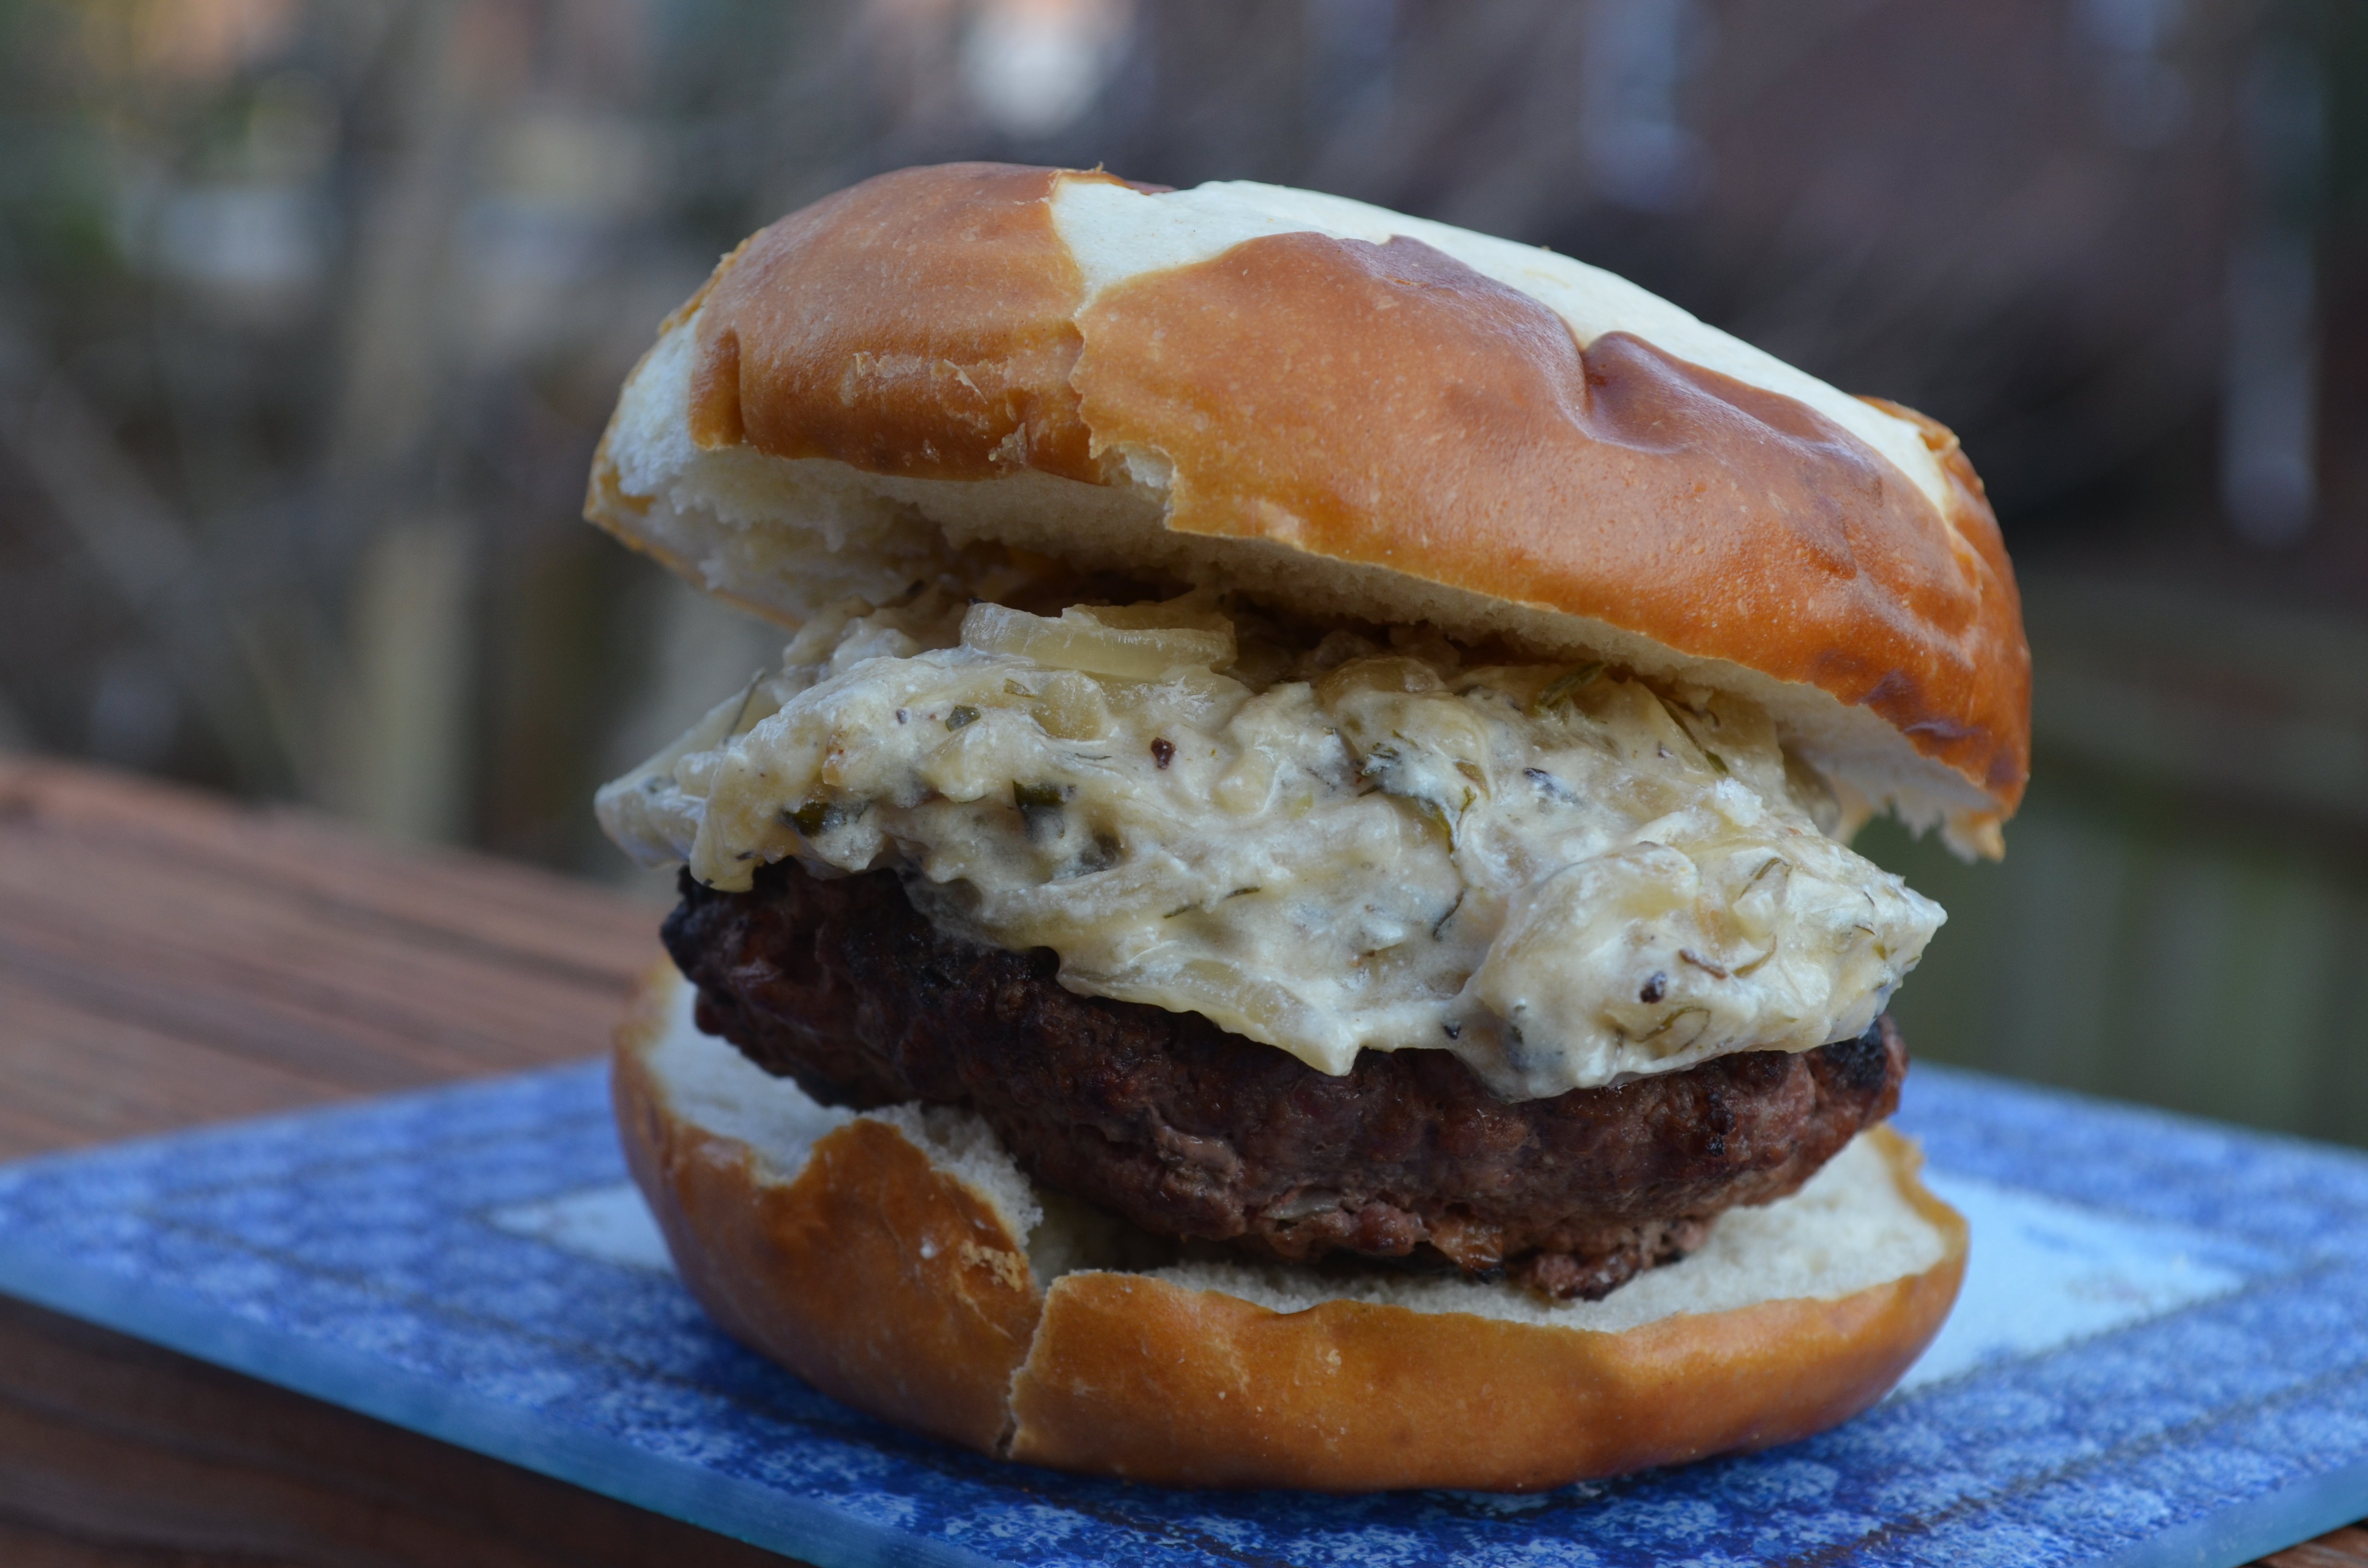
These actually aren’t what I expected when I first read “chili cheeseburger.”  There is no chili oozing out the sides of a super cheesy burger.  Nope.  Instead, it’s a burger flavored with many of the ingredients you’d use in chili, topped with a nice thick slice of sharp cheddar cheese, grilled onions, and sliced tomato.  Less steps than making chili to put on your burger, healthier, and with huge flavor payoff.  I used 92% lean beef for these and they were still oh-so-juicy.  Cooking Light, you did not fail me with this one!  As usual, my recipe had a few minor alterations.  I did not have jalapeno peppers on hand, so  I seeded some canned chipotle peppers and included those instead.  It lended a nice spicy/smoky flavor to the burger.  I also blended some with BBQ sauce and Greek yogurt to use as a topping to the burger instead of the usual ketchup/mayo/mustard.  Good call.  But you do with it what you will, as burgers are made to be modified to suit your tastes (and pantries)!

 Recipe Located At: http://www.myrecipes.com/recipe/mexican-chili-cheese-burgers-10000000226282/


Mexican Chili Cheeseburgers 

  Ingredients

  • 1 pound ground round
  • 1 cup chopped seeded plum tomato
  • 1/4 cup minced fresh cilantro
  • 1 tablespoon chili powder
  • 2 teaspoons minced seeded jalapeño pepper (or 2 teaspoons minced seeded chipotle pepper)
  • 1/2 teaspoon salt
  • 1/2 teaspoon dried oregano
  • 1/2 teaspoon ground cumin
  • 1/4 teaspoon pepper
  • Cooking spray
  • 4 (3/4-ounce) slices reduced-fat Monterey Jack or cheddar cheese
  • 1/4 cup lowfat Greek yogurt (or lowfat sour cream)
  • 1 tablespoon BBQ sauce
  • 1 tablespoon pureed chipotle pepper
  • 4 (1 1/2-ounce) hamburger buns
  • 8 (1/4-inch-thick) slices tomato (optional)
  • Grilled onions (optional)
  • Iceberg lettuce leaves (optional)

Directions

  1. Combine first 9 ingredients in a bowl; stir well. Divide mixture into 4 equal portions, shaping into 1/2-inch-thick patties.
  2. Prepare grill. Place patties on grill rack coated with cooking spray; grill 6 minutes on each side or until done. Place 1 cheese slice on top of each patty; cover and grill an additional minute or until cheese melts.
  3. While burgers cook, mix Greek yogurt or lowfat sour cream with pureed chipotle pepper and BBQ sauce.  
  4. Spread 1 tablespoon of yogurt mixture over top half of each bun, and set aside. Place patties on bottom halves of buns; top each with lettuce/ tomato/onions, (if desired), and top half of bun.
 

French Onion Dip Burgers May 17, 2014

Filed under: Uncategorized — lonislens @ 8:19 pm

Who doesn’t love French onion dip?  When you combine that flavor with a burger, you have yourself a winner—especially on toasted pretzel buns (not homemade, sorry).  The sauce that goes on this burger is good enough to eat on its own, which of course I did.  The original recipe calls for potato chips and pickles.  I didn’t have either, but I still thought these were some darn good burgers.  They weren’t as pretty as some burgers, but I don’t really care.   They’re also messy, but isn’t that a sign of a good burger?!

 Recipe Located At: http://www.rachaelraymag.com/recipes/rachael-ray-magazine-recipe-search/lunch-recipes/french-onion-dip-burgers


French Onion Dip Burger 

  Ingredients

  • 3 tablespoons butter
  • 5 onions, 4 thinly sliced and 1 peeled
  • bay leaf
  • Sea salt and pepper
  • 1/2 teaspoon ground thyme
  • 1 cup beef consomme
  • 1 1/2 cups sour cream
  • 2 pounds ground beef sirloin
  • About 1/4 cup worcestershire sauce (eyeball it)
  • A handful flat-leaf parsley, finely chopped
  • Olive oil, for drizzling
  •  buns, split

Directions

1.  Heat the butter in a large skillet over medium heat. Add the sliced onions and bay leaf; season with salt, pepper and the thyme.  Cook, stirring occasionally, until deep caramel and very soft, 35 minutes. Deglaze with the beef consomme; cook until all the    liquid   is almost absorbed. Let cool, then discard the bay leaf. Stir in the sour cream or Greek yogurt.

2.  Preheat a griddle or large cast-iron skillet over medium-high heat (we cooked ours on the grill). Season the beef with the worcestershire, salt (for a crusty coating) and pepper. Using a box grater, grate 3 to 4 tbsp. of the peeled onion over the meat (this flavors the meat and keeps the burgers moist). Add the parsley. Mix the meat (dont overwork) and form 6 patties thinner at the center than at the edges. Drizzle with olive oil. Cook, turning once, for 6 to 8 minutes for pink centers.

3.  Serve the burgers on the buns, topped with the sauce (and potato chips and pickles if you want).


Lemon Blueberry Sour Cream Crumb Bars May 5, 2014

Filed under: Uncategorized — lonislens @ 1:51 am

Yep, I’m still at it.  The lemon blueberry combination has not gotten old.  I made this recipe for a work picnic, and they were a hit. I will let you know in advance, these are more blueberry than lemon, though.  I’d actually amp up the lemon flavor in them if I make them again for myself.  If you have a crowd that prefers the blueberry to the citrus, then it is probably right up their ally.  Personally, I love a good kick of citrus.  I actually added lemon zest to the crust, which the recipe didn’t call for.  It still didn’t come through enough for my liking if I’m expecting lemon.  The crust is deliciously buttery, which always makes for a good bar.  I found I needed to bake mine longer than the recipe called for, and the center kind of all melded together so it looked more like blueberry than sour cream/blueberry.  That didn’t bother me at all, though.  Also, it always seems like I don’t have as much crumble topping as the photo of the recipe I’m making.  I think people are secretly using more than they’re telling me on their blogs.  😉


 Recipe Located At: http://therecipecritic.com/2014/03/lemon-blueberry-sour-cream-crumb-bars/


Blueberry Bars 

  Ingredients

Crust:

  • ½ c butter, melted and cooled to room temperature
  • ½ c light brown sugar
  • 1½ cup all purpose flour
  • ½ tsp baking soda
  • ½ tsp baking powder
  • ¼ tsp salt
  • 1 tsp lemon zest

Filling:

  • 2 cups fresh blueberries
  • ¾ cup sugar
  • 2 teaspoons cornstarch
  • 1 Tablespoon lemon juice
  • ½ c sour cream
  • ¼ cup granulated sugar
  • 1 Tbsp all purpose flour
  • 1 egg
  • ½ tsp vanilla extract


Directions

  1. Preheat oven to 375 and prepare an 8×8 square pan by lining with parchment paper and spraying with cooking spray.
  2. Make the crust by whisking together in a medium bowl the flour, brown sugar, baking soda, baking powder and salt. Add the melted butter. The dough will be crumbly but make sure all of the butter is incorporated.
  3. Reserve ¾ cup of the crust and press the remaining into the bottom of your 8×8 prepared baking pan.
  4. Combine the fresh blueberries, sugar, cornstarch, and lemon juice in a small bowl until the combined and set aside.
  5. For the sour cream filling, mix together in a large bowl the sour cream, sugar, 1 Tbsp flour, egg, and vanilla. Pour over the crust in your 8×8 pan.
  6. Spoon the fresh blueberry mixture evenly over the sour cream.
  7. Sprinkle your reserved ¾ cup crust over the top and bake for 25-28 minutes or until golden brown. Cool completely and serve into squares. Store in the refrigerator up to 3 days.
 

Gluten Free Lemon Blueberry Loaf April 27, 2014

Filed under: Uncategorized — lonislens @ 7:56 pm

You’ll probably be seeing a lot of the lemon/berry combination over the next couple of months.  The lemon berry breakfast cookies were awesome, but I think this recipe may have topped them.  They’re different enough that the cookies don’t have to be jealous, though.  I was surprised at how moist and light this bread was.  I would describe it as a “coffee cake” type bread, but definitely not a sink-to-the-bottom-of-your-stomach coffee cake.  It’s another gluten-free recipe with my co-worker in mind.  If you’re not on a gluten-free diet, you can just use regular flour.  I made the original recipe a bit lighter with egg whites and banana instead of the eggs, and 2% milk instead of the whole milk.  You really don’t taste the banana in the final product, either.  Does it help convince you to try this recipe out if I tell you I am about to put another loaf in the oven?


 Recipe Located At: http://www.glutenfreeyummy.com/gluten-free-blueberry-loaf/


Lemon Blueberry Loaf 

  Ingredients

  • 1 1/2 cups Gluten-free flour
  • 1 tsp. baking powder
  • 1/2 tsp. salt
  • 1/2 cup coconut oil
  • 3/4 cup organic cane sugar
  • 1 Tbsp. finely grated lemon zest
  • 1 egg white
  • 1 medium ripe banana, mashed very well
  • 1/2 cup 2% milk
  • 1 tsp. pure vanilla extract
  • 1 cup fresh blueberries


For the syrup:

  • 3 Tbsp. fresh lemon juice
  • 3 Tbsp. agave syrup


For the glaze (which you could probably skip if you want to save on sugar):

  • 1/2 cup confectioners’ sugar
  • 3 tsp. fresh lemon juice

  Directions

1.  Preheat oven to 350 degrees.

2.  In a medium size bowl mix flour, baking powder and salt. In a separate bowl, beat the coconut oil, organic cane sugar and lemon zest on medium-high speed. When color lightens, add the eggs one at a time, until each is fully incorporated. Add the milk and vanilla and stir. Blend in dry ingredients. In a small bowl, toss the blueberries with the 1 teaspoon gluten-free flour. Gently fold into the batter.

3.  Scrape batter into a prepared loaf pan (I lined mine with parchment paper, but you can use a non-stick spray as well). Place in the center of a preheated 350 degree oven and set the timer for 45 minutes (you may need to cook it for 50-55 minutes, whenever a toothpick inserted in the center comes out clean.)

4.  While the bread is baking, make the syrup: mix lemon juice and agave syrup in a small bowl (I heated the mixture in the microwave so it really formed a nice cohesive syrup).

5.  Once you have removed the bread from the oven, allow to cool for about five minutes before transferring to a plate. Using a wooden skewer, pierce the top of the bread all over using a wooden skewer, then brush  the loaf generously with the syrup, allowing it to seep into the holes.

6.  Allow the loaf to completely cool before icing it with the glaze. Stir together the confectioners’ sugar and lemon juice in a small bowl. Drizzle the glaze over the top. Makes 1 large loaf.


Classy Cube Steak with Balsamic Onion & Mushroom Sauce April 23, 2014

Filed under: Uncategorized — lonislens @ 7:15 pm

I’ve never cooked cube steak before.  I actually rarely cook beef (which is rather punny, since I do prefer my beef on the rare side).  I was honestly somewhat intimidated by this.  It was the last of a wonderful large package of meat my parents gave my husband for his birthday.  The package was from an awesome local butcher and included everything from bacon-wrapped filet mignon to a whole chicken to salmon.  I decided to go with a pretty standard pan-seared cube steak recipe I found online, but I jazzed it up with an improvised sauce.  We have a delicious raspberry dark balsamic vinegar that I used to caramelize the onions.  Then I added in some baby portabello mushrooms, garlic, Italian seasoning, a little salt, plenty of ground black pepper, a little bit of stock, and at the end, a dallop of Greek yogurt to make it creamy (though it would have been great as-is).  YUM.  I could eat this on its own.  The cube steak was very tender (which is what I worried most about) and the slight acidity of the sauce was the perfect balance for the fried meat.  Because this is one of my own creations, some of the amounts are guess-timated.  I’ll make the sauce again and keep closer track.  This is why most of my dinners never make it to the blog!


 Recipe Adapted From: http://thepioneerwoman.com/cooking/2010/08/fried-round-steak/


Classy Cube Steak


  Ingredients

  • 1 pound cube steak
  • 1 cup All-purpose Flour
  • 1 teaspoon Seasoned Salt
  • 3 teaspoons Ground Black Pepper, Or To Taste
  •  Salt, For Seasoning Meat
  • 1/2 cup Canola Oil (more If Needed)
  • 1 Tablespoons Butter
  • 8 oz baby portabello mushrooms, sliced
  • 1 large Vidalia onion, thinly sliced
  • 2 tablespoons balsamic vinegar (if you don’t have a sweeter version like I used, add about 1/2 a teaspoon of sugar)
  • 2 cloves minced garlic
  • 1 tablespoon Italian seasoning
  • 1/4 cup low-sodium beef stock
  • Ground black pepper and salt to taste
  • Two tablespoons Greek yogurt

Directions

  1. Place onions in a pan over low heat.  Add two tablespoons balsamic vinegar.  Cook on low until caramelized.  Add in mushrooms, garlic, Italian seasoning, salt, pepper, and stock.  Keep on low heat until meat is cooked.

  2. Heat oil in a large skillet over medium heat.

  3. Mix together flour, seasoned salt, and pepper.

  4. Season both sides of steaks with salt and pepper. Dredge each piece in flour mixture, pressing to coat with as much flour as possible.

  5. Add butter to pan right before frying.

  6. When butter is melted, fry pieces of steak in butter/oil mixture. Flip when sides are deep golden brown and cook about 1 minute on the other side.

  7. Remove to a paper towel-lined plate. 

  8. Add Greek yogurt to sauce if desired.  Spoon sauce over meat and serve immediately.
 

Tilapia with Lemon-Garlic Sauce

Filed under: Uncategorized — lonislens @ 1:30 am

I do feel like I fall into a rut sometimes when it comes to tilapia.  It’s pretty much the only fish I’ll eat (I buy salmon for the husband and daughter, but I don’t like it myself).  So it was fortuitous timing when the Cooking Light I just picked up featured several tilapia recipes.  I want to try them all, but this one was the winner for a Monday night when I didn’t want to have to go to the grocery store to pick up anything extra.  You really can’t go wrong with fish and lemon, and I add garlic to recipes that don’t even call for it, so this was a no-brainer for me.  I like how quickly it came together, and the preparation was not as messy as an egg dip would have been.  It was very tasty with a perfectly crisp outer layer and soft, flaky inside.  Sometimes I have to make myself really want to eat fish.  I found myself gobbling this up!  The one thing I noticed was that my sauce really thickened up more than expected.  I added a dash more broth and wine and it worked out fine.  Oh, and if you’re a pescetarian–you can easily swap out vegetable broth for the chicken broth (I actually did this myself).  I served it with green beans that I sauteed in sesame oil.  It’s my new addiction after having them like this at a restaurant a few weeks ago and falling in love.

 Recipe Located At: http://www.myrecipes.com/recipe/tilapia-lemon-garlic-sauce-50400000134197/


Tilapia with Lemon-Garlic Sauce 

  Ingredients

  • 4 (6-ounce) tilapia fillets
  • 1/4 teaspoon salt
  • 1/4 teaspoon freshly ground black pepper
  • 3 tablespoons quick-mixing flour (such as Wondra)
  • 2 tablespoons unsalted butter, divided
  • 1 tablespoon olive oil
  • 1 tablespoon minced garlic
  • 1/3 cup dry white wine
  • 1/3 cup unsalted chicken stock
  • 2 tablespoons chopped fresh parsley (I only had the squeeze tube kind on hand, so mine didn’t turn out as pretty)
  • 1 tablespoon fresh lemon juice

Directions

1. Sprinkle fish with salt and pepper. Place flour in a shallow dish. Dredge both sides of fish in flour; reserve unused flour. Heat a large skillet over medium-high heat. Add 1 tablespoon butter and oil to pan; swirl to coat. Add fish to pan; cook 2 minutes on each side or until fish flakes easily when tested with a fork. Remove from pan; keep warm.

2. Add reserved flour and garlic to pan; cook 90 seconds or until lightly browned, stirring constantly. Add wine and stock, stirring with a whisk; bring to a boil. Cook 2 minutes or until slightly thickened. Remove pan from heat; stir in remaining 1 tablespoon butter, parsley, and lemon juice. Serve fish with sauce.


Lemon Berry Breakfast Cookies April 20, 2014

Filed under: Uncategorized — lonislens @ 10:08 pm

Cookies for breakfast?  Why not.  Especially when they are loaded with berries and fresh lemon zest/juice.  What a refreshing way to start the day.  These are perfect for those with food allergies, as they are gluten-free, egg-free and dairy-free.  That may sound scary to those who do not avoid gluten, eggs or dairy, but I promise…they are good!!  Mine did not look quite like the ones on the blog I found the recipe on.  I’m not sure if I had more berries than the original, and that might have had something to do with it.  The recipe says one pound, but that really does seem like a lot.  I think I’d try with a pint next time.  While they were a little softer due to the berry content, they didn’t lack in the delicious department.  I went with a combination of blueberries and raspberries, as that is what I had on hand.  The recipe calls for blackberries, which I am sure would also be scrumptious.

 Recipe Located At: http://iowagirleats.com/2014/03/14/lemon-blackberry-breakfast-cookies/


Lemon Berry Breakfast Cookies 

  Ingredients

  • 3-3/4 cups old fashioned oats, divided (make sure they’re certified gluten free if you are gluten intolerant)
  • 1/2 teaspoon baking soda
  • 1/2 teaspoon salt
  • 1/4 cup ground flaxseed
  • 1/2 cup unsweetened applesauce
  • 1/2 cup mashed very ripe banana (about 1 medium banana)
  • 1/4 cup + 2 Tablespoons honey
  • 1/4 cup + 1 Tablespoons coconut oil, melted
  • 1 Tablespoon lemon zest
  • 1/4 cup lemon juice (about 1 lemon)
  • 1 pint berries, rinsed and patted dry

Directions

  1. Preheat oven to 350 degrees then line a baking sheet with a silpat or parchment paper and set aside. Add 1-3/4 cups oats to a food processor then process for 3-4 minutes or until very fine to make oat flour.
  2. Add oat flour, remaining 2 cups oats, baking soda, salt, and ground flaxseed to a large bowl then mix to combine. Add applesauce, banana, honey, coconut oil, lemon zest, and lemon juice then mix until just combined. Carefully fold in blackberries then let batter sit for 10 minutes to thicken.
  3. Scoop 1/4 cup batter onto prepared baking sheet then wet hand with water and press down to flatten slightly (cookies will not spread.) Bake for 8-10 minutes, or until cookies are golden brown around the edges and set on top. Cool completely then store in an airtight container for up to 2 days, in the refrigerator for up to 4 days, or wrap individually in plastic wrap then freeze in a freezer bag. Wrap in a paper towel then microwave for 20 seconds to thaw.
 

“The Best Toddler Muffins” April 13, 2014

Filed under: Uncategorized — lonislens @ 5:22 pm

Well with a title like that, of course I had to try these muffins!  I know it seems like I make a new muffin recipe every weekend, because I pretty much do.  They’re perfect for freezing, and not only do they make good toddler snacks, but they make good mom-on-the go snacks.  I have to leave the house by 5:15 three days a week, so there’s not a lot of thinking that can go into what I do at that time of day.  This recipe uses a bunch of ingredients most people have on hand, so that’s always a plus.  I added a little ground flax seed and cut down the sugar by 1/4 cup (mostly because I used vanilla Greek yogurt, which meant I had that added sugar).  The oats in these mean you really feel full longer, which is perfect for busy days!

 Recipe Located At: http://www.annies-eats.com/2014/03/06/jalapeno-cheddar-biscuits-with-salsa-avocado-and-eggs/


Best Toddler Muffins 

  Ingredients

  • 3/4 cup brown sugar
  • 1/3 cup of plain or vanilla Greek yogurt (heaping cup)
  • 1/3 cup unsweetened applesauce
  • 1/4 cup butter, softened
  • 3 eggs
  • 1 cup pumpkin puree
  • 1 cup finely shredded carrots (about 2 medium carrots)
  • 2-3 very ripe banana’s, smashed (the riper the better)
  • 1 cup quick oats
  • 1 cup whole wheat flour
  • 1 cup all-purpose flour
  • 2 tablespoons ground flax seed
  • 1 tsp salt
  • 2 tsp baking soda
  • 2½ tsp cinnamon
  • ⅛ tsp nutmeg (optional)

Directions

  1. Preheat oven to 375 degrees
  2. Cream together: sugar, yogurt, applesauce and butter
  3. Add eggs, pumpkin, carrots, and bananas
  4. Mix well add all dry ingredients: oats, wheat flour, all-purpose flour, ground flax seed salt, soda, cinnamon and nutmeg
  5. Mix until combined
  6. Scoop batter into greased mini or regular muffin tins. Can use cupcake liners if you prefer. Recipe can make 48 mini muffins or 20-24 regular size muffins.
  7. Bake at 375 for 12-15 minutes for mini-muffins or 15-18 or until toothpick comes out clean for regular size muffins.
  8. Remove from pans and cool on cooling rack.
 

Carrot Pancakes April 8, 2014

Filed under: Uncategorized — lonislens @ 11:59 pm

Just in time for the Easter Bunny, here is a good carrot recipe you can whip up in no time!  I adapted the recipe based on what I had on hand, and to make it a little healthier.  For example, instead of 3 tablespoons of butter, I used one tablespoon of butter + 2 tablespoons of Greek yogurt.  I also swapped out one of the eggs for egg white.  I frequently make a blend of regular AP flour and whole-wheat flour.  The original recipe calls for a decadent-sounding maple cream cheese topping that includes full-fat cream cheese and 4 tablespoons of butter.  I just spread a dab of low-fat cream cheese right on top of the warm pancakes and drizzled a little maple syrup (the real stuff, of course).  A few simple changes and you have a fairly healthy breakfast-for-dinner meal.  As you can tell by my previous biscuit sandwich post, I adore breakfast for dinner.  The toddler especially likes it because she winds up with fun shaped pancakes.  Last night she had a man-shaped pancake.  Is it bad of me to giggle a little as she bites the syrup-soaked head off of the little guy?  Bobby Flay would appreciate my serving suggestion, surely.


 Recipe Adapted From: http://www.cookingchanneltv.com/recipes/bobby-flay/carrot-cake-pancakes-with-maple-cream-cheese-drizzle-and-toasted-pecans.html


Carrot Pancakes 

  Ingredients

For the pancakes: 

  • cup all-purpose flour
  • 1/2 cup whole wheat flour
  • tablespoons pure cane sugar
  • 2 tablespoons brown sugar
  • teaspoon baking powder
  • teaspoon pumpkin pie spice
  • 1/2 teaspoon baking soda
  • 1/2 teaspoon fine sea salt
  • large egg
  • 1 egg white
  • 1 1/2 cups buttermilk* (I was feeling inventive and used 1 cup buttermilk and 1/2 cup of a carrot/mango/ginger juice I had)
  • tablespoons unsalted butter, melted and cooled
  • 1/2 teaspoon pure vanilla extract
  • cup packed finely grated peeled carrots, patted dry on paper towels (about 3 medium carrots)
  • teaspoon finely grated orange zest, optional
  • tablespoon finely diced candied ginger (I didn’t have this on hand, so I used some regular minced ginger from the fridge)
  • 1/4 cup finely chopped toasted pecans or walnuts, optional (plus more for garnish if you wish)
  • Cooking spray or melted butter

*Note: If you don’t have buttermilk, try putting one tablespoon of white or apple cider vinegar into one cup milk.  It will “curdle” the milk and is a good replacement for buttermilk.  It is the secret to keeping the pancakes light and fluffy!

For serving:

  • Reduced fat cream cheese (I used a tiny bit of the spreadable kind, as you would use butter on pancakes)
  • Maple syrup (go for the good stuff)

Directions

1.  Preheat the oven to 200 degrees F.  Whisk together the flour, sugar, baking powder, pumpkin pie spices, baking soda, and sea salt in a large bowl. Whisk together the egg/egg white, buttermilk, melted butter and vanilla in a large bowl. Add the carrots and orange zest (if using), and mix until smooth. Add the wet ingredients to the dry ingredients. Fold in the ginger and pecans (if using), and mix until just combined. Cover and refrigerate for at least 30 minutes and up to 3 hours. 

2.  Heat a large nonstick skillet or griddle over medium heat (I love our electric griddle, a winn. Coat the skillet with cooking spray or brush with melted butter. Spoon 1/4 cup mounds of the batter onto the skillet, spreading with a spatula (or the back of a big spoon). Cook until the tops are covered with bubbles and the edges look cooked, about 2 minutes. Carefully flip the pancakes over and cook until the bottoms are lightly browned, about 1 minute. Repeat with the remaining batter. Keep the cooked pancakes warm in the oven on a baking sheet, if desired.

3.  Top with a dab of reduced fat cream cheese, maple syrup, and chopped nuts (if using).  Or, go all out and make the topping the original recipe calls for.

Perfect for Easter brunch.  Or Monday night dinner!  


Jalapeno Cheddar Biscuit Sandwiches April 3, 2014

Filed under: Uncategorized — lonislens @ 6:59 pm

Breakfast for dinner is a favorite in this house.  The bonus is, we usually have leftovers we can enjoy for breakfast the next day!  Unfortunately, I do not always have the best luck making biscuits.  I try to follow the steps, but mine often don’t seem to be as big or as tall.  These were still a wonderful consistency—tender, fluffy, buttery and not too dense.  But somehow, they just didn’t turn out as well as the ones on Annie’s blog.  Such is life.  I’ve since received some tips and recipes for other biscuits that I will try and report back to you on.  Either way, these were delicious and went very well with runny eggs, salsa, avocado, and a little bit of my favorite condiment (recaito).

 Recipe Located At: http://www.annies-eats.com/2014/03/06/jalapeno-cheddar-biscuits-with-salsa-avocado-and-eggs/


Jalapeno Cheddar Biscuit 

  Ingredients

For the biscuits: 

  • 2 cups all-purpose flour
  • 2 tsp. baking powder
  • ¾ tsp. salt
  • ¼ tsp. coarsely ground pepper
  • 8 tbsp. cold unsalted butter, cut into small pieces
  • 3 oz. sharp cheddar cheese, shredded (I used an amazing Cabot Farmhouse Reserve (no sponsorship) sharp cheddar–it was white, so it blended in a little more with the color of the biscuits.  I promise it’s there, though!)
  • 2 jalapeño peppers, seeded and finely minced
  • ¾ cup milk
  • 1 tbsp. butter, melted

For serving:

  • Salsa
  • Sliced Avocado
  • Eggs (poached, fried, whatever you prefer)
  • Recaito

Directions

1. Preheat the oven to 400˚ F.  Line a baking sheet with a silicone baking mat or parchment paper.  In a medium bowl, combine the flour, baking powder, and salt.  Whisk to blend.  Stir in the pieces of butter and toss to coat in the dry ingredients.  Using two forks or a pastry cutter, cut the butter into the dry ingredients until the mixture is coarse largest butter chunks are the size of small peas.  Stir in the cheddar and diced jalapeños and toss briefly to combine.  Pour in the milk and stir gently with a fork until a sticky dough has formed.

2. Turn the mixture out onto a well floured work surface.  Don’t worry if the dough has some dry bits.  Briefly knead until the dough is mostly cohesive and no longer sticky, being careful not to overwork it.  Form the dough into a square slab about 7 x 7″.  Use a sharp kitchen knife and cut into thirds in one direction, and then the other to form 9 square biscuits.*(You can freeze at this point if you wish.)  Transfer the biscuits to the prepared baking sheet and brush the tops of the biscuits lightly with the melted butter.

3. Bake for about 18 minutes, rotating the pan halfway through baking, until the tops are golden and the biscuits are baked through.  Transfer to a wire rack and let cool slightly before serving.  Serve as desired with salsa, avocado and eggs.  I liked the cilantro taste of the recaito.  If you haven’t tried it, you definitely should.  A little goes a long way and it’s excellent stirred into chili, eggs, and just about anything.